How to Configure NAT (Static, Dynamic, and PAT) for Internet Access in Cisco Packet Tracer

In modern networks, private IP addresses are commonly used within organizations, but these addresses cannot directly access the internet. To enable communication with public networks, Network Address Translation (NAT) is used. There are three main types of NAT:
- Static NAT - Maps a private IP to a dedicated public IP.
- Dynamic NAT - Maps private IPs to a pool of public IPs on a first-come, first-served basis.
- PAT (Port Address Translation) - Also knows as NAT Overload, allows multiple private IPs to share a single public IP by using unique port numbers.
Since PAT is the most widely used method in real-world environments, we'll include it in this to simulate a small office/home office network with private devices accessing the internet.
Topology Overview
Devices:
- 1 Router (Performing NAT)
- 1 Switch
- 3 PCs (Private LAN Clients)
- 1 Web Server (Hosted on a public IP, accessible from the internet)
Network Details:
|
Network |
Subnet |
Devices |
Gateway (Router) |
|
Private Network |
192.168.1.0/24 |
Pcs (192.168.1.10 - 12 |
192.168.1.1 |
|
Public Network |
203.0.113.0/24 |
Web Server (203.0.113.100 |
203.0.113.1 |
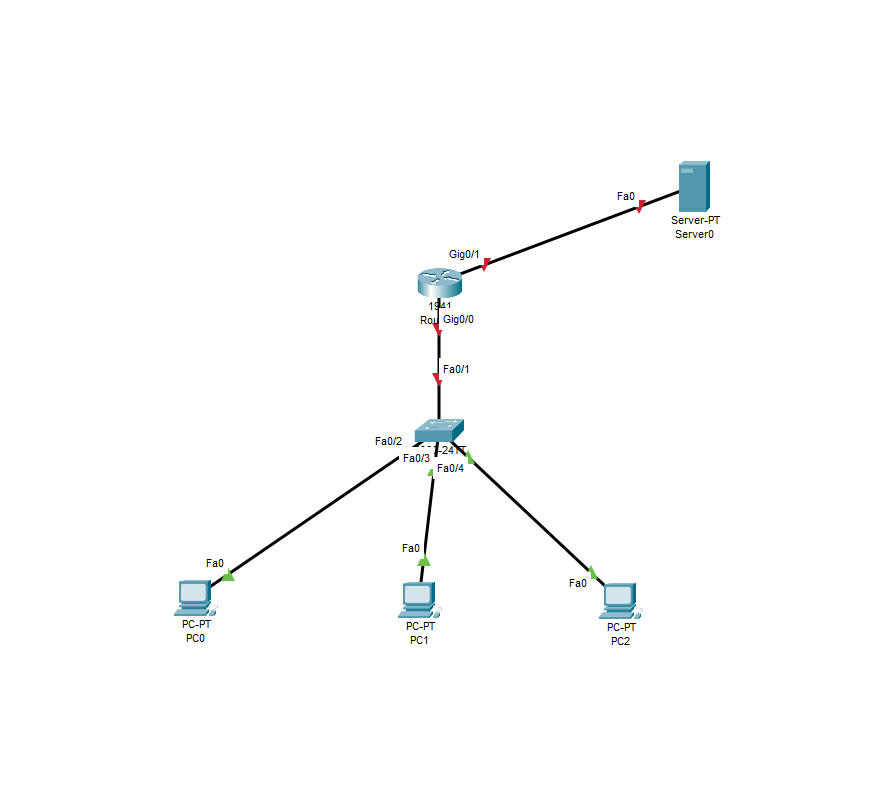
- Build the Topology in Packet Tracer
- Drag and Drop Devices:
- Add 1 router, 1 switch, 3 Pcs, and 1 Web Server.
- Connect Devices:
- PCs to Switch, leaving Fast Ethernet 0/1 for the router
- Switch to Router on Fast Ethernet 0/1 and Gigabit Ethernet 0/0
- Router to Web Server on Gigabit 0/1 to Fast Ethernet 0/0
- Configure the Private Network
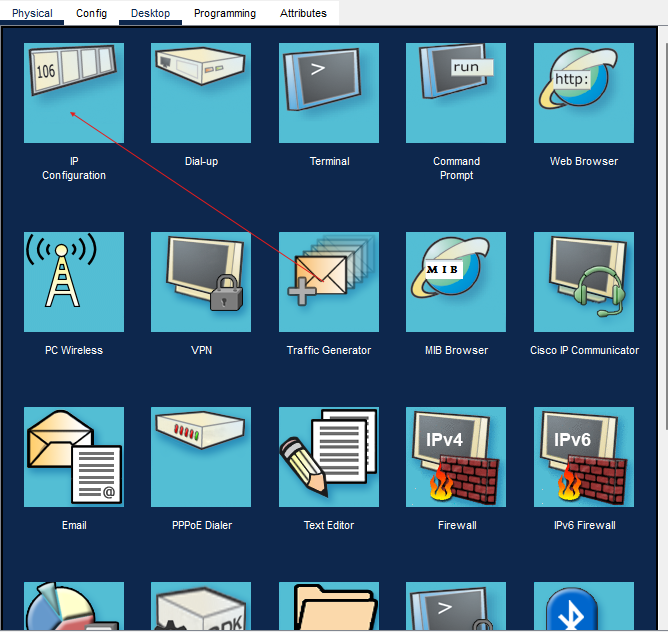
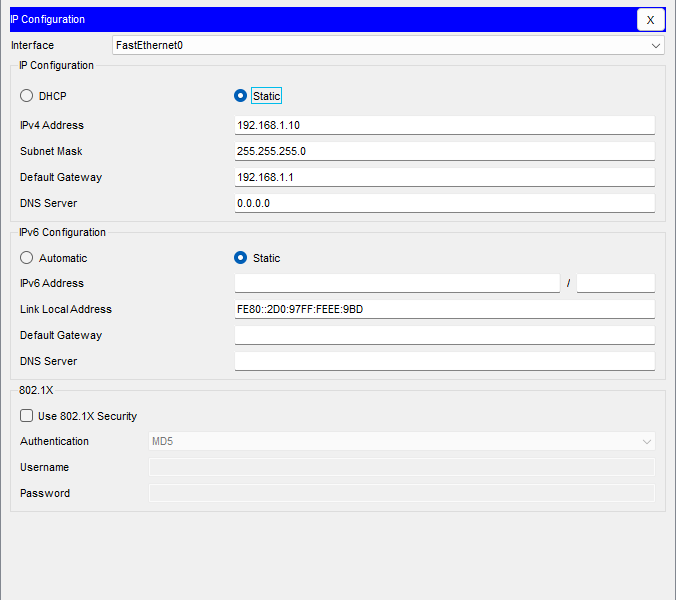
- Assign IPs to PCs:
- On each Pc, go to Desktop > IP Configuration and set:
- PC1: 192.168.1.10/24, Gateway: 192.168.1.1
- PC2: 192.168.1.11/24, Gateway: 192.168.1.1
- PC3: 192.168.1.12/24, Gateway: 102.168.1.1
Configure Router's LAN Interfaces:
- Assign an IP to the router's private network interface:
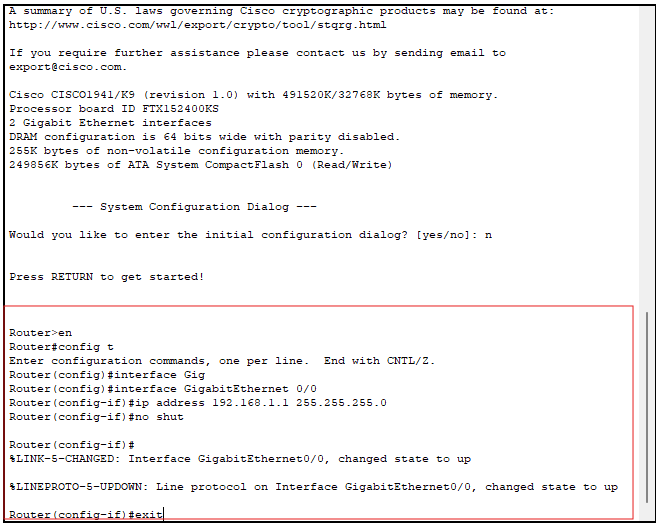
- Click the router and go to CLI, type no to bypass the wizard set up.
Router> enable
Router# configure terminal
Router(config)# interface GigabitEthernet0/0
Router(config-if)# ip address 192.168.1.1 255.255.255.0
Router(config-if)# no shutdown
Router(config-if)# exit
- Configure the Public Network
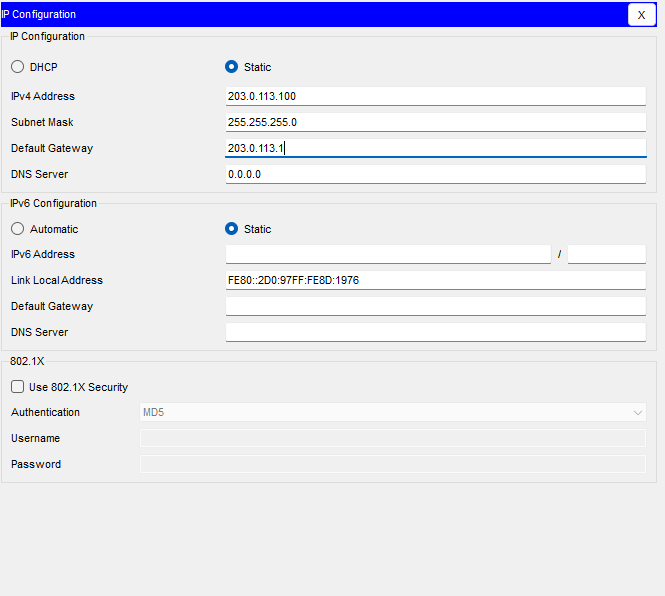
- Assign an IP to the Web Server:
- Go to the Web server's Desktop > IP Configuration and set:
- IP: 203.0.113.100
- Subnet: 255.255.255.0
- Gateway: 203.0.113.1
- Go to the Web server's Desktop > IP Configuration and set:
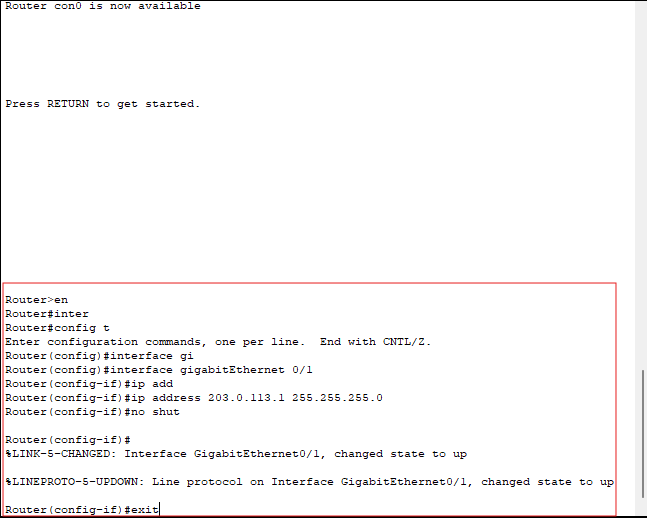
- Configure the Router's Wan Interface:
- Assign an IP to the router's public network interface:
Router(config)# interface GigabitEthernet0/1
Router(config-if)# ip address 203.0.113.1 255.255.255.0
Router(config-if)# no shutdown
Router(config-if)# exit
- Configure NAT
Static NAT (For the Web Server)
Static NAT is used when an internal device (such as a web server) needs to be accessible from the public internet.
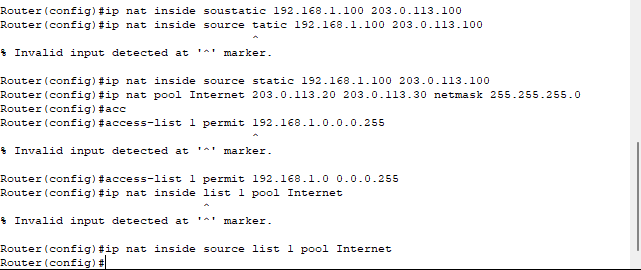
- Map the Web Server's Private IP to a Public IP:
Router(config)# ip nat inside source static 192.168.1.100 203.0.113.100
- This ensures that any external request to 203.0.113.100 is forwarded to 192.168.1.100
Dynamic NAT (For Internal Devices)
Dynamic NAT allows private IPs to be assigned a public IP from a pool.
- Define a Public IP Pool:
Router(config)# ip nat pool Internet 203.0.113.20 203.0.113.30 netmask 255.255.255.0
- Create an Access Control List (ACL) for Allowed Private IPs:
Router(config)# access-list 1 permit 192.168.1.0 0.0.0.255
- Blind the ACL to the NAT Pool:
Router(config)# ip nat inside source list 1 pool Internet
On the router, it should look something like this:
PAT (Port Address Translation) - NAT Overload
PAT allows multiple devices to share a single public IP address
- Configure PAT on the Router:
Router(config)# ip nat inside source list 1 interface GigabitEthernet0/1 overload

The router will dynamically assign ports to each connection, allowing multiple devices to share a single public IP.
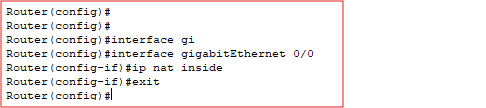
- Define NAT Interfaces
- Set the Private (inside) Interface:
Router(config)# interface GigabitEthernet0/0
Router(config-if)# ip nat inside
Router(config-if)# exit
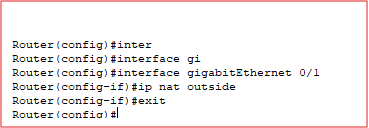
- Set the Public (Outside) Interface:
Router(config)# interface GigabitEthernet0/1
Router(config-if)# ip nat outside
Router(config-if)# exit
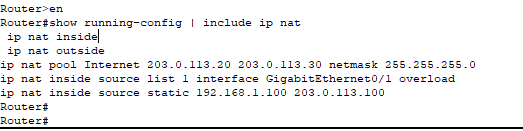
We can run the following command at the end to view our NAT settings:
show running-config | section interface
Test NAT Configuration
- Verify Static Nat (Web Server)
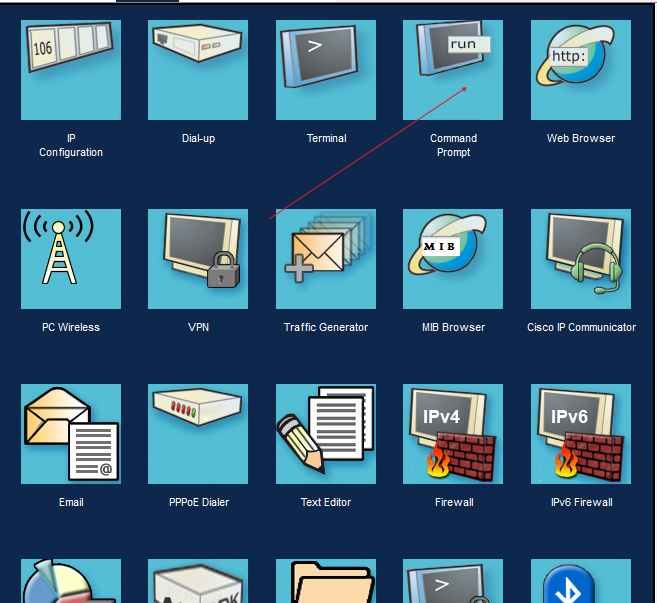
Open PC1's Command Prompt and Ping the Web server's address.
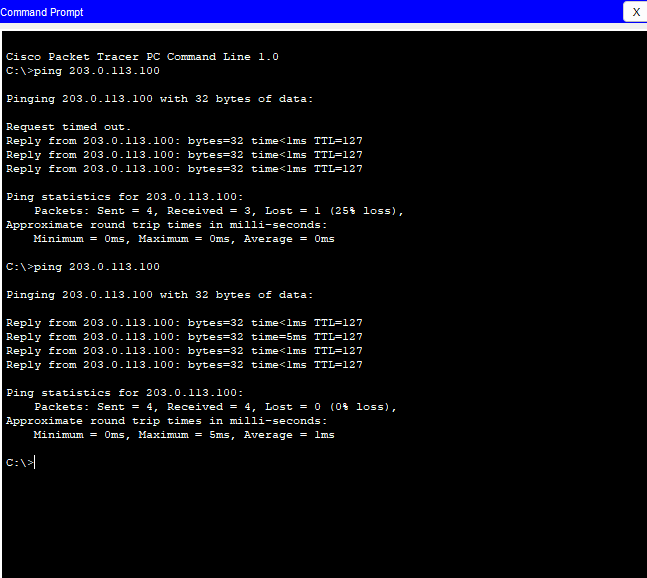
We are able to ping the Web Server's IP address from PC1
Verify Dynamic NAT
- Use each PC and ping the Web server's IP address of 203.0.113.100
- Now, on the router, view NAT translations.
Router# show ip nat translations
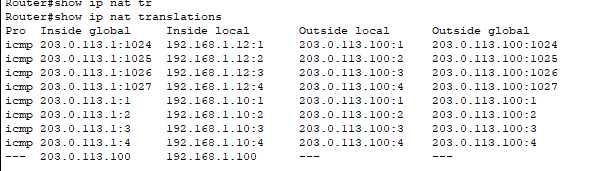
The "Inside Global" 203.0.113.1 is the public address assigned by NAT for outbound traffic.
The "Inside local" 192.168.1.x represents the actual devices sending the requests.
The "Outside Local" and "Outside Global" 203.0.113.100 shows the destination of the web server.
The ICMP (Ping) requests from different internal hosts 192.168.10, 192.168.1.11, 192.168.1.12 are being translated to 203.0.113.1 with different source ports 1024, 1025 etc.
What we can see from this is that PAT is correctly translating private IPs 192.168.1.x to a single public IP 203.0.113.1.
Conclusion
In this lab, you have configured both Static NAT and Dynamic NAT, and PAT to allow devices to access external networks while preserving public IPs. This is a critical concept in networking.
Hope this guide was helpful and Happy Netoworking!