How to Use Cisco Port Security to Block Unauthorized Devices

If you've ever worked in a shared office space or managed a network, you know how easy it is for someone to plug in a laptop and get online. Sometimes it's harmless. Other times, it's a serious security risk.
In this post, I'll show you how to use Cisco Port Security in Packet Tracer to lock down switch ports so that only trusted devices can connect. We'll set it up, see what happens when an unknown device tried to plug in, and learn how to recover from a violation.
Requirements
- 1 Cisco 2960 switch
- 2 PCs (PC0 and PC1
- Ethernet cables
Step 1: Set up the Topology
- Open Packet Tracer
- Add the devices :
- Drag a 2960 switch into the workspace
- Drag two Pcs (PC0 and PC1) into the workspace
- Connect the devices:
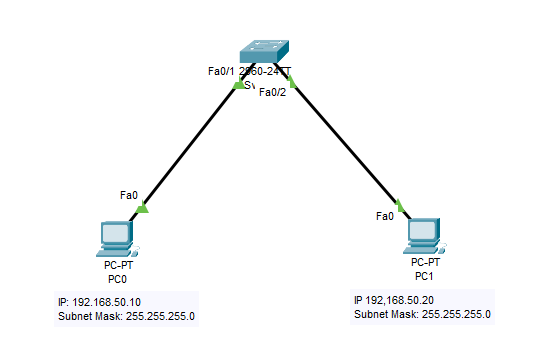
- PC0 —> Switch Fa0/1
- PC1 —> Switch Fa0/2 (This will be used to trigger violation)
We are going to be simulating PC0 as the authorized device and PC1 as the unauthorized device.
See the image below of my Topology
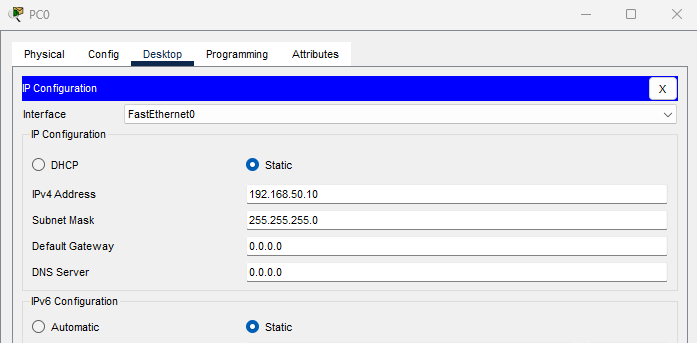
Step 2: Configure PC0 with a Static IP
- Click PC0
- Go to Desktop tab —> IP Configuration
- Set:
- IP: 192.168.50.10
- Subnet Mask: 255.255.255.0
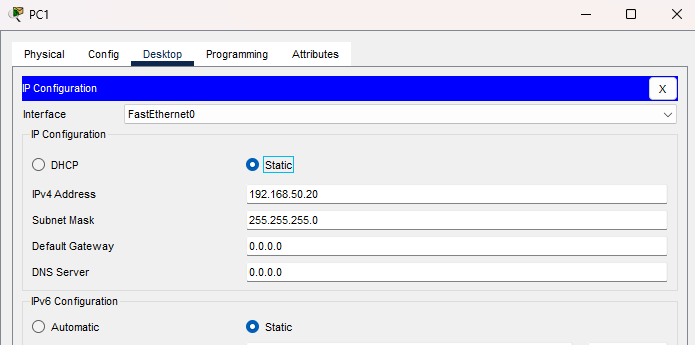
- Do the same for PC1 with:
- IP: 192.168.50.20
- Subnet Mask: 255.255.255.0
Step 3: Configure Port Security on the Switch
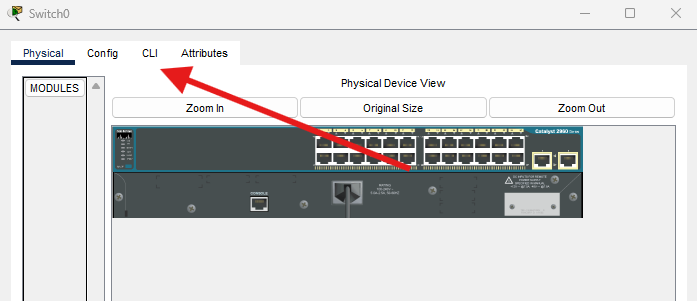
Click on the switch and go to the CLI section and press enter.
Now we can configure the interface Fa0/1 for PC0's port
enable
configure terminal
interface fa0/1
switchport mode access
switchport port-security
switchport port-security maximum 1
switchport port-security violation shutdown
switchport port-security mac-address sticky
Okay, so what have we just written out.
- access mode: This will disable dynamic trunking. Since the port is connected to the PC and not another switch, we want it to behave as a standard access port
- port-security: It enables the feature to use Port Security on the switch
- maximum 1: Only one MAC Address is allowed. This number can be increased as you may have multiple MAC addresses using this port in a VLAN.
- violation shutdown: Shuts the port down if the policy is broken
- mac-address sticky: auto-learns the MAC and locks it
end
write memory
Step 4: Verify Sticky MAC address
Open up the command prompt of PC0 and ping a random IP address in the same subnet range as PC0. I pinged 192.168.50.99
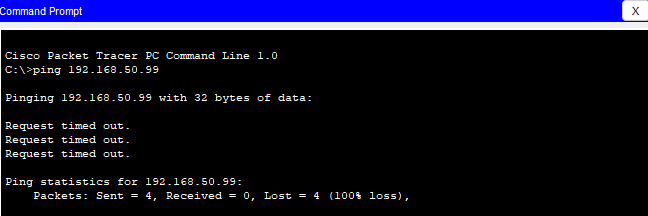
This will cause PC0 to send an ARP request, which is enough for the switch to capture its MAC address.
We can check that by going to the switch and typing the command:
show mac address-table interfaces fastEthernet 0/1
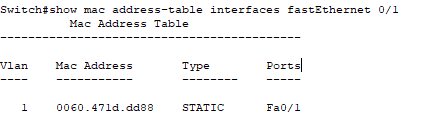
We can see the MAC Address is 0060.471d.dd89
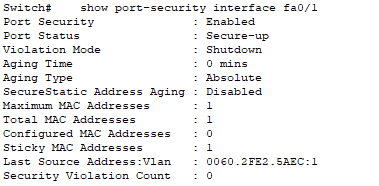
We can also run another command, to see what the port is doing with the MAC address.
show port-security interface fa0/1
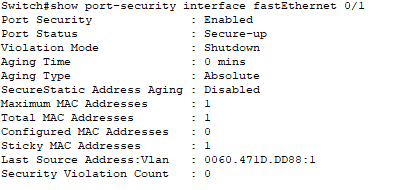
Here we can see:
- Port Status: Secure-Up
- Sticky MAC Addresses: 1
Step 5: Trigger the Port Security Violation
Now we can trigger the port security by plugging are PC1 into Fa0/1 that we set up.
- Disconnect PC0 from Fa0/1
- Connect PC1 to Fa0/1
- Ping 192.168.50.99 from PC1
If we do the following command:
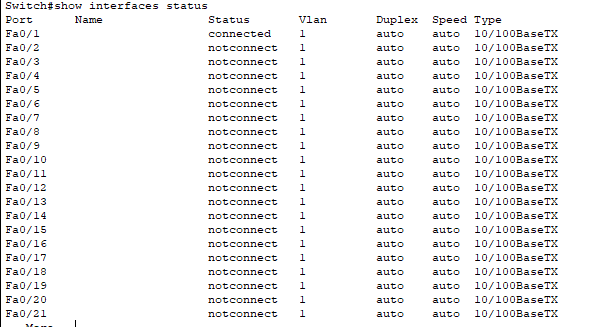
show interfaces status
We can see that port has gone into err-disabled

We can also run the command:
show port-security interface fa0/1
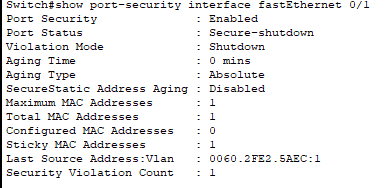
This states that the port has been shutdown due to a security violation
Step 6: Recover the Port
We will need to manually bring the port back up. To do this, we will need to use the following commands on the switch.
configure terminal
interface fa0/1
shutdown
no shutdown
end
We can now reconnect PC0 and test again
Running the command:
show interfaces status
We can see that the port is connected.
Running the command
show port-security interface fa0/1
We can see that the MAC address is back to PC0 and Port Security is back to normal.
Conclusion
Port security might seem like a small feature, but it plays a big role in securing the edge of your network. In this lab, you saw how easy it is to restrict access to known devices, and how the switch reacts when something unfamiliar tries to sneak in.
This kind of control is essential in real-world environments, whether you're locking down ports in a small office or preparing for a role in a larger enterprise.
Hope you enjoyed this guide and Happy Networking!